
Article Number: 59 | VC6 | VC5 | VC4 | VC3 | Post Date: March 26, 2018 | Last Updated: December 26, 2025
Can I put logos or decals on trailers or vehicles?
METHOD 1 | VC6 and VC5 USERS | Use materials menu option
VC6
The VC6 User's Guide reviews how to add decals or logos using the materials menu interface.
VC5
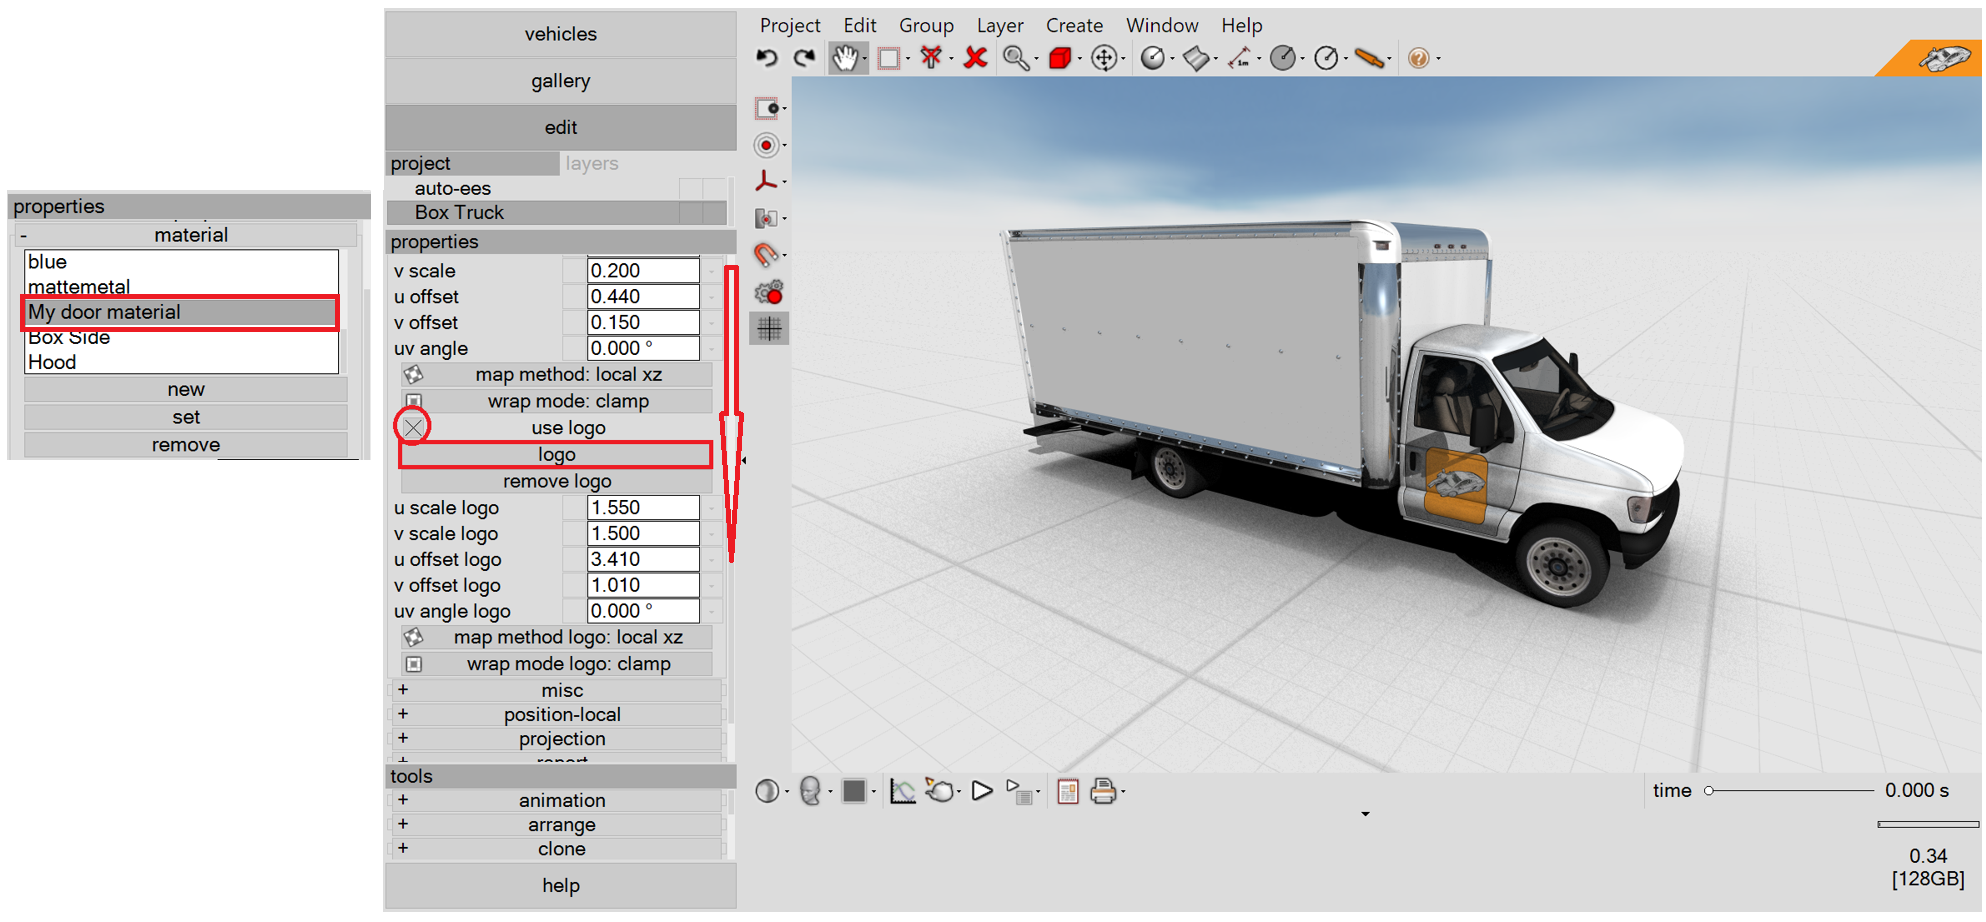
The User’s Guide (VC5) reviews two methods for applying decals to vehicles in VC5. The preferred method is to take advantage of the “use logo” feature in the material menu. First, left-click on the material name in the material menu, next scroll down and enable the “use logo” toggle. Left-click on the “logo” button to locate the image file with your logo. Finally, set the (u,v) scale and (u,v) offset as needed.

METHOD 2 | VC4 and vc3 USERS | use group object
Users will easily be able to add decals on vehicle options in the future. It can also be done with current functionality, but there are a few steps involved. Below, we’ll walk through the steps of adding a decal onto a trailer. The final trailer can be seen in the video below.
First, we input a 2-axle 40 ft trailer from the vehicle database. We changed the faces shader to white rather than cab (see: http://www.vcrashusa.com/blog/2016/7/1/adding-striping-or-color-schemes-to-vehicles) . We placed this trailer at x=0, y=0 (this is important). We also made a clone of our trailer for reference. This will be used later.
Next, make a “Traffic Sign” object in your scene. Simply left-click on “Traffic Sign” and then left-click in your scene.

Change the sign’s type to “none”. This will remove the signpost.
Next, drag and drop your sign image file onto the sign object. Note, png files with transparent pixels, the transparent pixels will remain preserved. Adjust the size of your decal as needed.
We’re going to add four decals to our trailer - two on each side.
Next, place all sign objects at x=0, y=0. Don’t worry about the orientations yet.
Next, remove physics from your trailer.
Next, select your trailer and all sign objects, and group them.
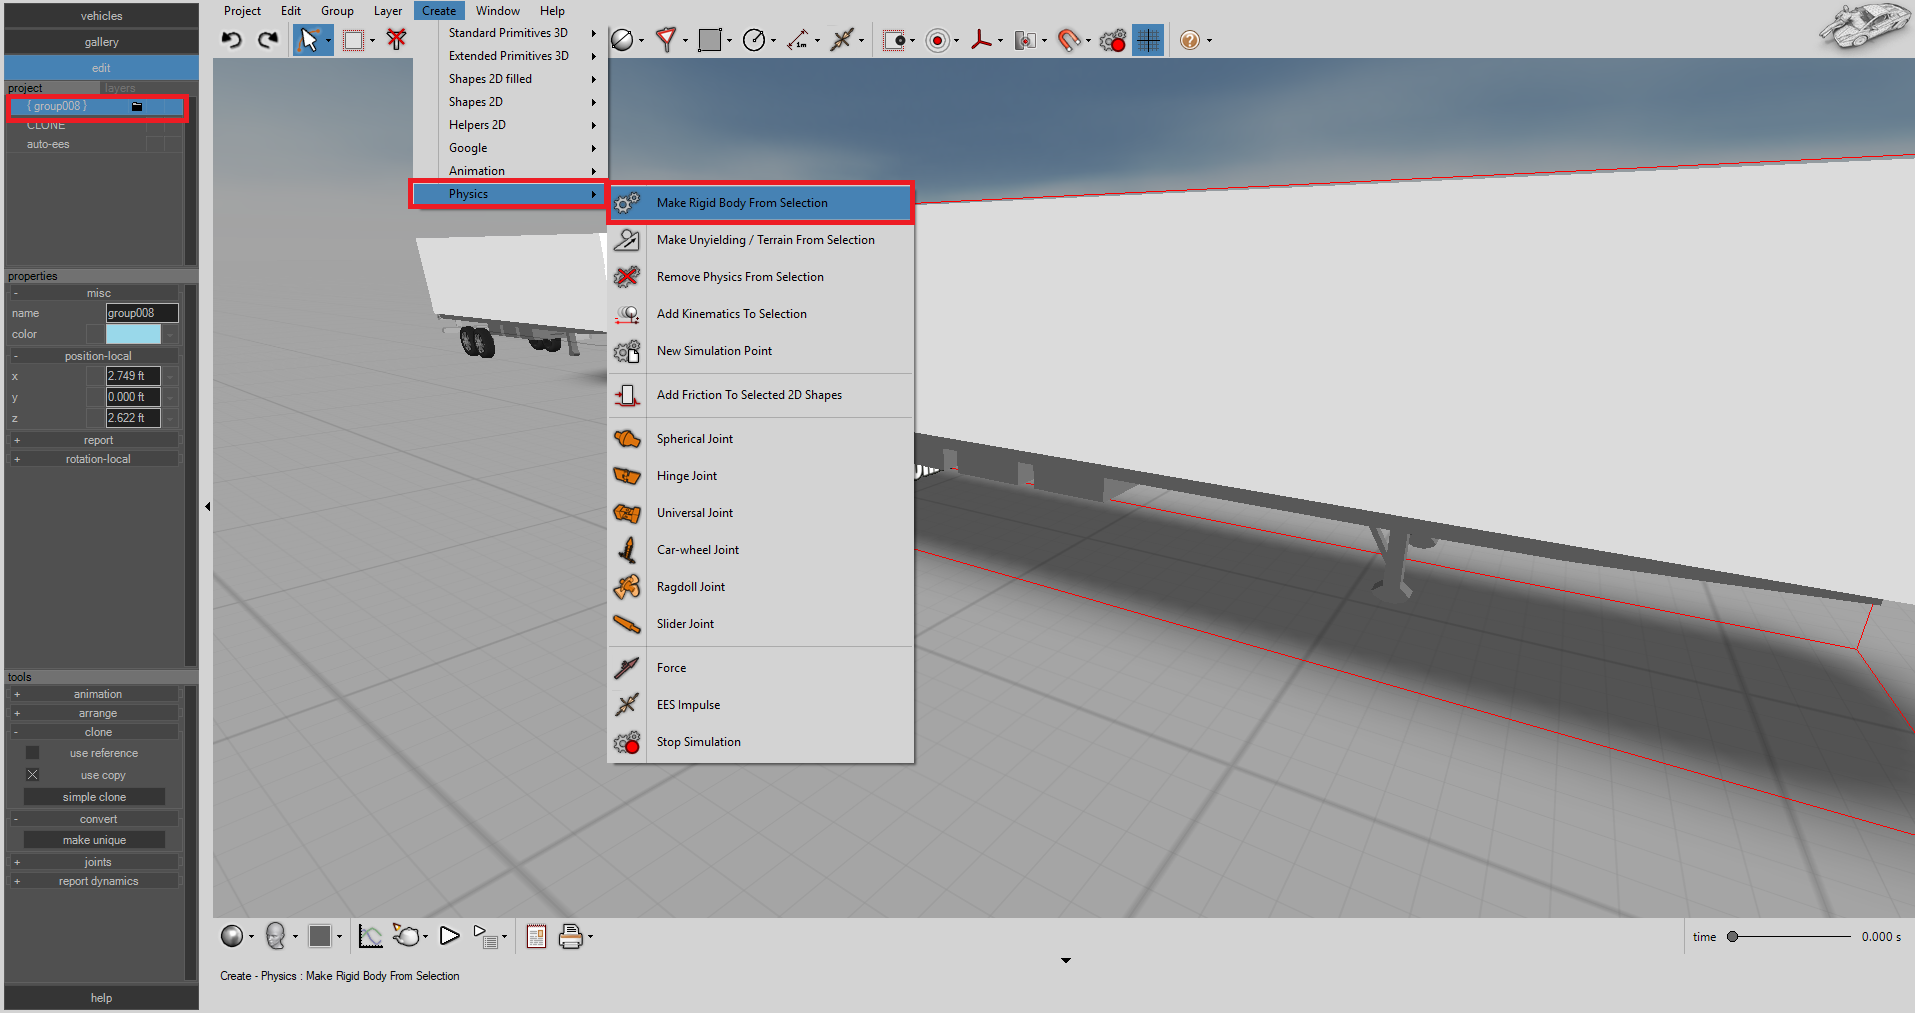
Next, select the group object, and make the group a rigid body.
Next, add two axles to the group object.
Go through all vehicle properties and ensure that your trailer’s settings are appropriate. Here, we use our cloned trailer for reference which speeds up the process of setting axle, ground clearance, wheel, and inertial properties. In the “mass properties” menu, make sure to select type “semi-trailer”. Doing so ensures that you can use the “pick leader” feature in the “trailer” menu.

Next, open the group object folder, and set the position and orientation as needed for your signs. Note, the position-local and rotation-local values will be with respect to the group’s reference frame. In this case, we just need to adjust the position of the signs on one side of the trailer, then mirror those positions for the signs on the other side using the position-local input values. You can also resize the signs as needed.
Finally, close the group folder. Under the group object’s contact menu, change the preferred collision model to Kudlich-Slibar, if you want to use the same collision model that’s used by default for trailer objects.
Rename your group object to whatever you wish and save your file as a vc3 or vc4.
Open your simulation or animation project file. Go to Project > Import and select your trailer vc3 or vc4 file that you saved in the previous step. You should see the group object appear in you project.
Open the group object’s trailer menu, left-click on “pick-leader” and left-click on your lead vehicle. You’ll see the two automatically connect.
Use your mouse to re-orient the trailer as needed. As always, adjust the properties in the trailer menu as needed for your case.

The advantage of using a group object in this way is you are free to open the group and change the texture map used for the sign anytime you wish. Simply left-click on the sign object, then in the “texture-cap” menu, left click on “file” and select the image file you’d like to use for your decal.
Here we see a final rendering of the trailer with decals.
Please note, when using a group object as a rigid body, as we do here, you will not be able to enable the deformation option using the ees object as you normally would with a vehicle object.
You can create complex composite vehicle objects using the above method. Again, the advantage of using this method is that you can modify the constituent object properties, such as replacing a sign object's texture-cap; however, you'll generally want to export your vehicle's as vcm files (if possible) in order to ensure you can enable the deform property of your simulation's ees object. Exporting composite objects as vcm files is illustrated here: http://www.vcrashusa.com/blog/2016/6/11/make-your-own-vehicle-modifications.
Once a vcm object is imported into the scene, it can be converted into a rigid body object and axles can be added as we did above, or you can drag and drop your vcm file onto an existing vehicle object to do a direct substitution of the wire frame mesh. In our example here of combining a sign and trailer object, we were not able to use the vcm object since the sign's texture map properties are discarded when saved to the vcm file format.
Tags: Logo, decal, sticker, emblem, adding logo, putting decal, badge, shield.
© 2020 Virtual CRASH, LLC. All Rights Reserved